
Deluxe Drip Irrigation Kit for Container Gardening
Congratulations on your purchase of a Deluxe Drip Irrigation Kit for Container Gardening with 1/4" Micro-tubing Mainline from Drip Depot! Please take a few minutes to read through these instructions and familiarize yourself with all the parts. For assistance with part names and details, you can print the list of parts included in your kit from the Kit item page on our website. Drip Depot Irrigation kits are modular in design, as no two gardens are completely alike. Should you have any questions while installing your kit please feel free to email our Customer Support team or review some of the many resources in our Education Center, found under the "Learn" tab in the menu bar on our website.
Please note: If using a hose-end water timer to automate your drip system the Head Assembly must be installed after or downstream of the timer or valve. Drip irrigation products are not rated for constant pressure use. See image below. Many municipal codes require the use of anti vandalism protection (set screw) on an outdoor water spigot backflow preventer. The J10 locking screw may qualify when properly installed directly on the outdoor hose bibb. If used on an automatic water timer for your irrigation system we recommend not tightening the screw as the plastic threads can be permanently damaged if backflow device is removed. 2. Determine the best layout for your 1/4" mainline to reach all your container plants. Keep in mind the 1/4" micro-tubing has a 30' maximum single run length. Begin to lay out the 1/4" micro-tubing.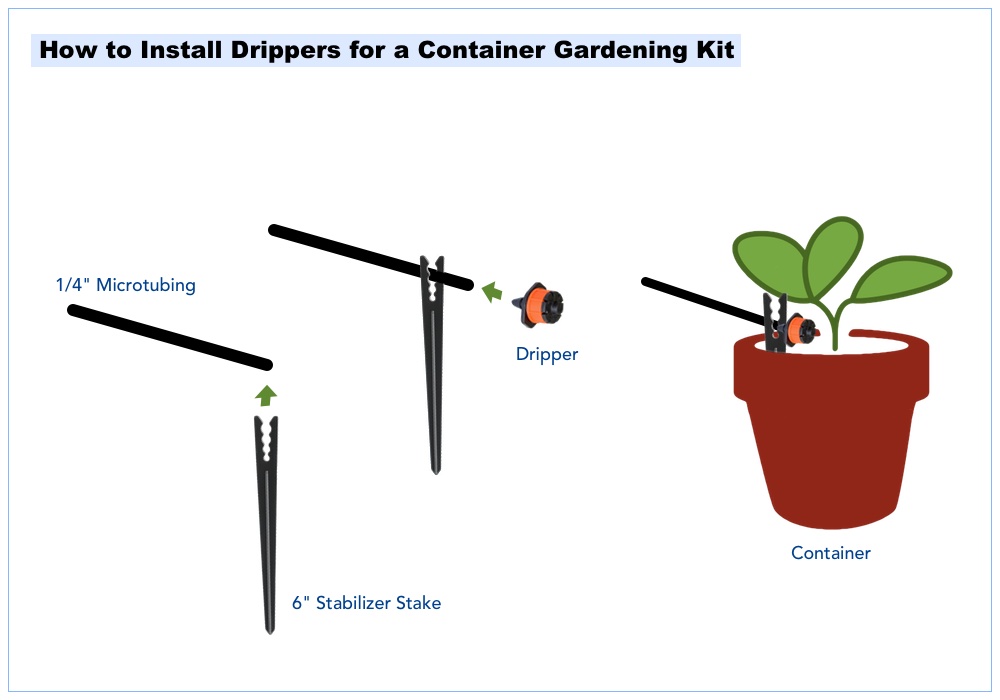 3. At each container you will cut the mainline and insert a Barbed Tee fitting. Then cut another section of the 1/4" micro-tubing to reach from mainline tee fitting into the container. Attach one end of this tubing section to the barbed tee and the other end to the barbed inlet of the dripper. 4. Snap the dripper line into the Stabilizer Stake to secure, then insert the stake into the container. 5. Connect the mainline 1/4" tubing to the remaining barb on the barb tee and continue to the next container. 6. Repeat steps 3 - 5 until you reach the last container. With the last container you can just connect the dripper into the end of the 1/4" micro-tubing, snap into the drip stake and insert into the container.
Tips:
